
Have you ever wondered how a toy airplane engine works or wanted to build one yourself? Imagine the pride you’ll feel when your handmade engine powers a tiny plane soaring through the air.
This guide will show you simple steps to create your own toy airplane engine using easy-to-find materials. By the end, you’ll not only understand how it works but also have a fun project that brings your creativity to life. Ready to turn your curiosity into action?
Let’s dive in and make your toy airplane engine a reality!
Materials Needed
Gathering the right materials is key to successfully building a toy airplane engine. Without proper tools and parts, your project can quickly become frustrating or unsafe. Let’s look closely at what you need to have before you start assembling your engine.
Basic Tools
Having the right tools makes your work easier and more precise. You’ll need a small screwdriver set to handle tiny screws, pliers for bending or holding parts, and a hobby knife for trimming any excess material.
A mini drill or pin vise can be very handy for making exact holes. Don’t forget a ruler or measuring tape to keep your parts aligned perfectly. These tools are usually inexpensive and can be found in most home toolkits.
Engine Components
The heart of your toy airplane engine lies in its components. You’ll need a small electric motor, which is often salvaged from old toys or bought online. Make sure it’s lightweight but powerful enough to spin the propeller.
Other essentials include a propeller that fits the motor shaft, wiring to connect the motor to a battery, and a small battery pack or power source. Bearings or bushings help the motor spin smoothly, and screws or glue will hold everything together.
Safety Gear
Safety can never be overlooked, even with small projects like this. Wearing safety glasses protects your eyes from flying debris when cutting or drilling. Gloves help prevent cuts and provide better grip on slippery parts.
A well-ventilated workspace is also important if you’re using glue or solder. Have a fire extinguisher nearby just in case sparks fly while working with electrical components. Taking these precautions ensures you stay safe and keep the project enjoyable.

Credit: www.stirlingkit.com
Designing The Engine
Designing the engine is a key part of making a toy airplane engine. It shapes how the engine will work and fit into the model. Clear plans help avoid mistakes and make building easier. Focus on simple ideas that fit your skill level and materials. A good design balances power and ease of building. Start by picking the right engine type, then draft a clear blueprint. Both steps guide the project from start to finish.
Choosing The Engine Type
Select an engine type that matches your toy airplane’s size and weight. Small propeller engines work well for lightweight models. Rubber band or spring-powered engines offer simple, safe options for beginners. Electric motors give steady power but need batteries. Consider parts you can find easily. Think about how much force the engine must create. Pick a design that fits your building tools and skills.
Creating A Simple Blueprint
Draw a clear blueprint before building the engine. Use basic shapes to show parts like the propeller, shaft, and casing. Label each part with its size and material. Keep the design easy to follow and avoid complex details. A simple blueprint helps track progress and shows how parts fit together. Use pencil and paper or a drawing app. Review the plan to check for mistakes or weak points.
Building The Engine Parts
Building the engine parts is where your toy airplane truly begins to take shape. Each component plays a crucial role in bringing the engine to life. Focusing on crafting each part carefully ensures your engine will run smoothly and efficiently.
Crafting The Cylinder
The cylinder is the heart of your toy airplane engine. Start by selecting a lightweight, durable material like aluminum or sturdy plastic. Cut it into a small, hollow tube with smooth inner walls to allow the piston to move freely.
Pay attention to the cylinder’s dimensions—too tight, and the piston will jam; too loose, and you’ll lose compression. You might want to sand the inside gently to remove any rough edges. Have you ever noticed how precision in small parts impacts the whole engine’s performance?
Making The Piston
The piston fits snugly inside the cylinder and moves up and down to create motion. Use a piece of wood or plastic shaped into a small cylinder slightly smaller than the cylinder’s diameter. Attach a thin, flexible seal around the piston’s edge to keep the air pressure tight.
Consider adding a tiny rod to connect the piston to the crankshaft later. I found that testing different sizes of pistons can dramatically change how well the engine runs—don’t be afraid to experiment. What materials do you think would make your piston both strong and light?
Assembling The Crankshaft
The crankshaft converts the piston’s linear motion into rotational motion. Craft this part from a sturdy wire or metal rod bent into an offset shape. Attach one end to the piston rod and the other to the airplane’s propeller shaft.
Balance is key here—an unbalanced crankshaft causes vibrations that reduce efficiency. Use small washers or weights to fine-tune the balance if needed. Have you tried spinning a crankshaft by hand to feel how smooth your assembly is before finalizing it?
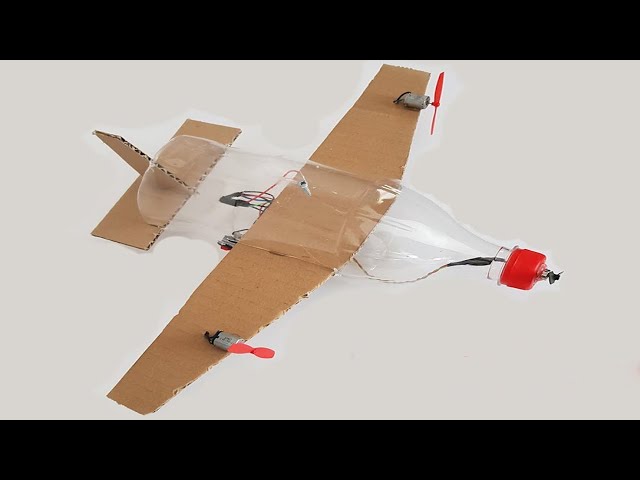
Credit: www.youtube.com
Assembling The Engine
Assembling the toy airplane engine is a key step in building a working model. This stage brings all the parts together to form a functioning unit. Careful assembly ensures the engine runs smoothly and lasts longer.
Fitting The Parts Together
Start by organizing all the engine parts on a clean surface. Check each piece for any defects or dirt. Align the components carefully to match their shapes and slots. Press parts gently but firmly to fit them in place. Avoid forcing parts; they should fit smoothly. Use small tools like tweezers or pliers for precision. Double-check that all pieces are correctly oriented before moving on.
Securing Moving Components
Moving parts need extra attention to avoid friction and wear. Use small screws or clips to hold these components securely. Make sure they can still move freely without too much tightness. Lubricate axles or gears lightly with oil or grease. Test the movement by spinning or sliding parts gently. Adjust any parts that feel stuck or loose. Proper securing helps the engine run quietly and efficiently.
Testing The Engine
Testing the engine is a crucial stage in building your toy airplane. It helps you ensure all parts work smoothly before you attach the engine to the airplane. Skipping this step can lead to frustration later, so take your time and be patient.
Initial Function Check
Start by connecting the engine to a power source carefully. Observe if the propeller spins freely without wobbling or unusual noises. A smooth, steady rotation means your engine is functioning well.
Check the engine’s response to changes in power. Does it speed up and slow down as expected? If the engine hesitates or stalls, something might be off with your wiring or motor alignment.
Use a small handheld tachometer or mark the propeller to count rotations per second. This helps you measure if the engine runs at the speed you designed it for. Are you surprised by how fast or slow it spins compared to your expectations?
Troubleshooting Common Issues
If your engine doesn’t start or runs unevenly, look for loose connections first. Many times, a simple loose wire causes big problems. Secure all connections and try again.
Listen closely to any strange sounds like grinding or clicking. These noises often point to misaligned gears or debris caught inside. Cleaning or repositioning parts usually fixes this.
- Check if the battery or power source is fully charged.
- Make sure the propeller isn’t bent or damaged.
- Inspect the motor brushes for wear or dirt.
Sometimes, the problem lies in the balance of the propeller. An unbalanced propeller creates vibrations that affect engine performance. Try swapping it with a known balanced one to test this.
Have you ever encountered a stubborn issue that needed an unexpected fix? Don’t hesitate to experiment carefully—it’s part of the learning process when making your own toy airplane engine.
Attaching The Engine To The Toy Airplane
Attaching the engine to your toy airplane is a crucial step that affects both performance and durability. How you mount the engine can change how well your airplane flies and whether it stays intact during use. Let’s look closely at effective ways to secure the engine and keep your model balanced for smooth flight.
Mounting Techniques
Choose a mounting method that fits the engine size and airplane design. Common approaches include using a small wooden block or metal bracket as a base. Secure the engine with screws or strong adhesive for a firm hold.
- Use a lightweight wooden block to avoid adding unnecessary weight.
- Make sure screws are tight but avoid over-tightening to prevent damage.
- Try hot glue for quick fixes, but remember it may not hold under strong vibrations.
Think about accessibility too. Can you easily remove the engine for adjustments or repairs? I once glued an engine too firmly and struggled to fix a misalignment later. Being able to detach the engine saved hours of frustration.
Balancing The Airplane
Balance is key for stable flight. After attaching the engine, check the airplane’s center of gravity. The engine’s weight often shifts this point forward, which might cause nose-dives or crashes.
Place the airplane on your fingers or a narrow edge to find its balance point. It should sit level or slightly nose-up. If it tips forward, add small weights to the tail or adjust the engine position slightly backward.
- Use modeling clay or small metal washers as tail weights.
- Test balance after each adjustment by gently tossing the airplane.
- Keep the total weight low to maintain good flight performance.
Ask yourself: Is the airplane steady when held by the balance point? If not, keep tweaking. Proper balance can mean the difference between a quick crash and a long, smooth flight.
Tips For Beginners
Building a toy airplane engine can be fun and rewarding. Beginners often face challenges but simple tips help avoid frustration. Focus on learning the basics and practicing patience. Small improvements make a big difference in your engine’s performance.
Avoiding Common Mistakes
- Check all parts fit tightly to prevent air leaks.
- Use the right type of glue to avoid weak joints.
- Do not rush assembly; follow instructions carefully.
- Keep moving parts clean and free from dirt.
- Test the engine gently before full use.
Improving Engine Performance
- Use lightweight materials to reduce engine weight.
- Balance the propeller to avoid vibrations.
- Apply a small amount of oil on moving parts.
- Ensure the fuel source is fresh and suitable.
- Adjust the air intake for better airflow.
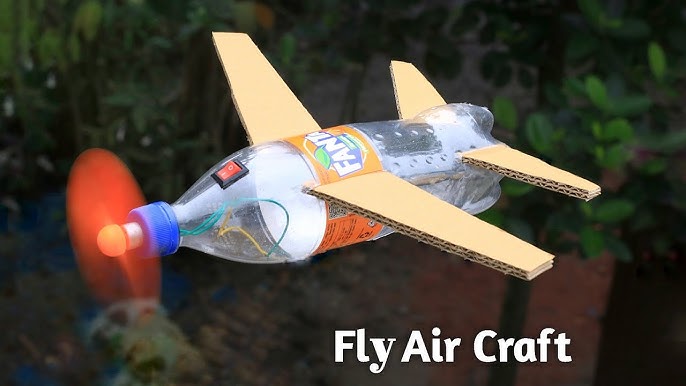
Credit: www.youtube.com
Frequently Asked Questions
What Materials Are Needed For A Toy Airplane Engine?
You need lightweight materials like plastic, small rubber bands, and metal pins. Also, a small propeller and a power source like a battery or rubber band are essential. These materials ensure the engine is efficient and safe for a toy airplane.
How Do You Assemble A Toy Airplane Engine?
Start by attaching the propeller to the motor or rubber band. Secure the motor onto the airplane frame. Connect the power source carefully to enable rotation. Follow step-by-step instructions to ensure each part fits snugly and functions properly.
Can A Toy Airplane Engine Be Powered By Rubber Bands?
Yes, rubber bands are a common power source. They store potential energy when twisted and release it to spin the propeller. This method is safe, eco-friendly, and easy to use for small toy airplane engines.
How To Ensure The Toy Airplane Engine Runs Smoothly?
Lubricate moving parts lightly to reduce friction. Make sure all components are tightly secured and balanced. Test the engine multiple times and adjust as needed for optimal performance and longer flight duration.
Conclusion
Building a toy airplane engine is a rewarding activity. It sparks creativity and enhances technical skills. With the right materials, you create something amazing. Remember, patience is key during assembly. Follow each step carefully for the best results. This project is perfect for hobbyists and beginners alike.
Enjoy the process and learn as you go. Share your creation with friends and family. Inspire others to try it too. Keep exploring new projects to expand your skills. Happy building, and may your toy airplane soar high!