
Have you ever wondered how to bring a simple toy car to life using steam power? Making a steam engine toy car is not just a fun project—it’s a chance to see science and creativity work together right before your eyes.
Imagine building something with your own hands that moves, hisses, and steams like a tiny engine! In this guide, you’ll discover easy steps to create your very own steam engine toy car. Get ready to impress your friends and learn how steam can turn a basic toy into an exciting machine.
Keep reading, and you’ll be amazed at what you can build!
Materials Needed
Gathering the right materials is key to building a steam engine toy car that works smoothly and looks great. You want items that are easy to handle but sturdy enough to handle steam pressure. Having everything ready before you start saves time and keeps frustration at bay.
Essential Mechanical Parts
- Small boiler or pressure chamber:This holds the water and generates steam. A mini metal container or a recycled small tin can works well.
- Piston and cylinder:These convert steam pressure into movement. You can craft them from metal tubes or sturdy plastic parts.
- Flywheel and crankshaft:These transfer the piston’s motion to the wheels. Look for lightweight metal or plastic gears.
- Wheels and axles:Choose wheels that roll smoothly, like those from old toys or craft stores. Axles should be firm rods or metal sticks.
Tools And Safety Gear
- Screwdrivers and pliers:For assembling parts and tightening screws.
- Drill or pin vise:To make precise holes for axles and steam outlets.
- Heat-resistant gloves:Steam and hot metal can burn; safety is a must.
- Protective eyewear:Always shield your eyes when working with steam or tools.
Additional Materials
- Water:Distilled water works best to prevent mineral buildup inside the boiler.
- Sealing materials:High-temperature silicone or plumber’s tape will keep steam from leaking.
- Glue or epoxy:Use strong adhesives designed for metal and plastic bonding.
- Paint and brushes:Add your personal touch and protect metal parts from rust.
Do you have access to recycled materials? Sometimes, old kitchen tins or broken toys can become perfect components, saving money and adding character. Think about what you already have around you before buying new parts.

Credit: kayunganjuk.com
Basic Steam Engine Principles
Understanding the basic principles behind a steam engine is key to building your own steam engine toy car. Steam engines convert heat energy into mechanical motion, using steam as the driving force. Grasping how steam pressure moves parts will help you design a car that runs smoothly and efficiently.
How Steam Creates Pressure
Steam forms when water heats up and turns into vapor. This vapor takes up more space and pushes against the walls of its container, creating pressure.
Think of a sealed pot on a stove. As water boils, pressure builds until it can move something—like a piston in an engine.
Have you ever noticed how a kettle whistles? That sound is steam escaping because pressure reached a certain point.
The Role Of The Piston
The piston is a small, movable part inside a cylinder that steam pushes against. When steam pressure increases, it forces the piston to move in a straight line.
This back-and-forth motion is the engine’s power source. Your challenge is to link this motion to the wheels of your toy car.
Imagine pushing a small rod with your finger repeatedly; that’s how the piston drives movement.
Converting Linear Motion To Wheel Movement
The piston’s straight movement needs to turn the wheels, which move in circles. This is done using a crankshaft or connecting rod.
These parts act like levers, translating the piston’s push into rotational motion.
Have you seen how a bicycle pedal moves up and down but the wheels turn round? It works similarly.
Maintaining Steam Supply And Exhaust
For continuous motion, steam must enter and exit the cylinder at the right times. Valves control this flow.
They open to let steam in, then close to trap it, and finally open to release used steam.
Imagine opening and closing a door rhythmically to let people in and out; valves work much the same way.
Safety And Pressure Control
Steam pressure can build quickly and become dangerous. Safety valves or vents release excess pressure to prevent accidents.
Even on a small toy, controlling pressure keeps your engine running safely and prevents damage.
Have you thought about how to add a simple pressure release to your design?
Building The Boiler
Building the boiler is a crucial part of making your steam engine toy car. This component holds the water that turns into steam, powering your tiny engine. Understanding how to choose materials, assemble the parts, and ensure everything is sealed tight will set your project up for success.
Choosing The Boiler Material
Your boiler needs to handle heat and pressure safely. Metals like copper or brass work well because they conduct heat evenly and resist corrosion. Avoid plastics or thin metals that can melt or burst under steam pressure.
Think about the thickness of the material too. Thicker walls provide extra safety but add weight. Have you checked if your chosen metal is easy to shape with your tools? This can save you a lot of frustration during assembly.
Assembling The Boiler
Start by cutting your metal sheets or tubes to the right size. Precision matters here—small gaps can cause leaks later on. Use clamps or a jig to hold pieces steady as you join them.
Soldering or brazing are effective ways to connect metal parts securely. If you’re new to these techniques, practicing on scrap pieces helps build confidence. Remember, a well-assembled boiler means your toy car will run longer and safer.
Sealing And Testing
Sealing the boiler ensures no steam escapes, which keeps pressure high enough to power your engine. Apply high-temperature sealant around all joints and inspect carefully for any gaps. Tight seals are your best defense against leaks.
Once sealed, test your boiler by adding water and gently heating it. Watch closely for any signs of leaks or unusual bulges. How does it feel watching your boiler hold steam without issues? This moment is rewarding and confirms your hard work.
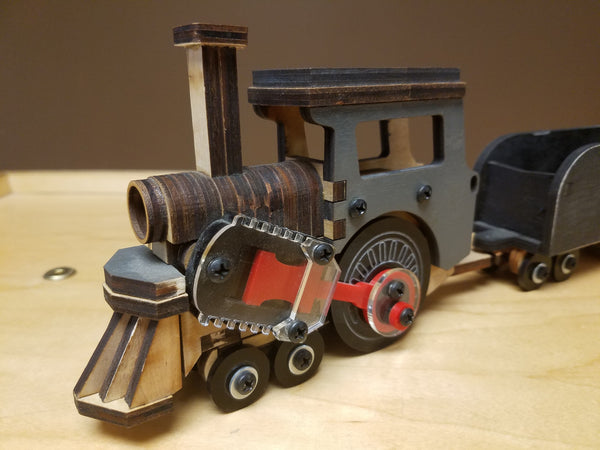
Credit: www.constructatruckusa.com
Constructing The Engine
Constructing the engine is where your steam engine toy car truly comes to life. This part demands precision and patience, but the reward is a working model that runs on steam power. Let’s break down the key components you need to build to get the engine functioning smoothly.
Making The Cylinder
The cylinder is the heart of your steam engine. Use a small metal tube or a sturdy plastic piece to serve as the cylinder body. It needs to be airtight so steam pressure can push the piston inside without leaks.
Make sure the ends are sealed tightly, except for one side where steam enters. You can drill a small hole for the steam inlet and attach a tiny valve to control steam flow. Remember, the cylinder size affects how much power your engine produces.
Piston And Connecting Rod
The piston fits snugly inside the cylinder and moves back and forth to create motion. Craft the piston from a piece of wood or metal that matches the cylinder’s inner diameter closely. Too loose, and steam will escape; too tight, and it won’t move freely.
Attach a connecting rod to the piston’s end. This rod transfers the piston’s movement to the wheels. Use a thin metal strip or sturdy wire, and secure it with a small pin or screw that allows some pivoting. It’s crucial that this connection moves smoothly to avoid stalling your engine.
Valve Mechanism
The valve controls when steam enters and exits the cylinder, managing the engine’s cycle. A simple rotary valve or slide valve can work well here. You can make a rotary valve from a small disc with holes that line up with the steam inlet at the right times.
Connecting the valve to the crankshaft ensures it turns in sync with the piston’s movement. This coordination is essential for smooth operation. If the valve timing is off, your engine may lose power or even jam.
Designing The Toy Car Body
Designing the toy car body is a crucial part of building your steam engine toy car. It shapes not only how your car looks but also how well it performs. A well-thought-out design balances durability, weight, and aesthetics to make your steam engine car both functional and fun to play with.
Selecting The Frame
Choose a frame material that is strong yet light. Wood and lightweight metal are great options because they provide stability without weighing the car down. Think about how the frame will hold the engine and wheels securely while allowing some space for steam to build up.
Have you considered using recycled materials? Old tin cans or sturdy cardboard can make for creative and eco-friendly frames. This not only saves money but adds a unique character to your toy car.
Attaching Wheels
Wheels must be firmly attached but still able to rotate freely. Use small axles or rods that fit snugly through the wheels and the frame. Make sure the wheels are aligned properly to avoid wobbling or uneven movement.
Try testing different wheel sizes. Larger wheels can give smoother rides, but smaller wheels might fit better with compact frames. What type of terrain will your toy car run on? That can help you decide which wheels work best.
Mounting The Engine
Secure the steam engine in a spot where it won’t shift during movement. It should be stable but also accessible for adding water and lighting the burner safely. Position the engine so that its steam output can easily connect to the pistons driving the wheels.
Have you thought about how the engine’s heat will affect the frame? Using heat-resistant materials or adding insulation can protect your car’s body. This step ensures your toy lasts longer and stays safe while running.
Credit: www.youtube.com
Assembling The Components
Assembling the components of your steam engine toy car is where the project truly comes to life. This stage demands patience and precision to ensure everything fits and functions smoothly. Paying close attention now will save you from frustrating breakdowns later.
Connecting Engine To Wheels
Start by attaching the engine to the wheels carefully. The engine’s crankshaft should align with the wheel axle to transfer motion effectively. Use small screws or clips to secure the engine firmly, but avoid overtightening which can restrict movement.
Check that the wheels spin freely once connected. If they feel stiff or wobbly, adjust the alignment or tighten the fittings slightly. Have you noticed how a slight misalignment can stop the entire mechanism from working? Getting this right is crucial for smooth operation.
Installing The Steam Pipe
The steam pipe carries steam from the boiler to the engine cylinder, so it must be installed with care. Connect one end securely to the boiler outlet and the other to the engine’s steam intake. Use heat-resistant tubing or metal piping designed for steam use.
Make sure the pipe is not kinked or bent sharply, as this can block steam flow and reduce power. Test the connection by running a small amount of steam through it to check for leaks. This step might seem simple, but a tight, leak-free seal makes a big difference in performance.
Ensuring Safety Measures
Safety should never be an afterthought when working with steam. Always wear gloves and goggles during assembly and operation. Double-check that all pressure valves and release mechanisms are installed properly to prevent accidents.
Keep your work area clear of flammable materials and never leave the toy car unattended while it’s running. Have you set up a safe space where you can test your steam engine without worry? Being proactive about safety lets you enjoy your creation without stress.
Operating The Steam Engine Toy Car
Operating a steam engine toy car is an exciting part of the building process. It brings your creation to life with real steam power. Understanding how to run the engine safely helps you enjoy the toy fully. This section covers the basic steps to operate your steam engine toy car properly.
Filling The Boiler
Start by filling the boiler with clean water. Use a small funnel or dropper for accuracy. Avoid overfilling to prevent spills and steam pressure issues. Leave some space for steam to build inside the boiler. Check that the boiler cap is tight after filling.
Igniting The Heat Source
Light the heat source carefully under the boiler. Common options include a small candle or solid fuel tablets. Keep a safe distance while igniting. The heat will cause the water to boil and produce steam. Watch the flame and adjust if it is too strong or weak.
Controlling The Speed
Steam pressure controls the toy car’s speed. Use the throttle or valve to regulate steam flow. Open the valve slowly for a steady speed. Close it partially to slow down or stop. Practice adjusting the speed to keep the car stable on the track.
Troubleshooting Common Issues
Troubleshooting common issues helps keep your steam engine toy car running smoothly. Small problems can stop your car quickly. Checking and fixing these issues saves time and frustration. Understanding basic fixes improves your experience with the toy.
Steam Leaks
Steam leaks reduce pressure and slow down the engine. Check all connections for loose fittings. Tighten any nuts or bolts carefully. Look for cracks in the tubing or boiler. Replace damaged parts to prevent leaks. Use soapy water to find small leaks by watching for bubbles.
Engine Not Moving
The engine may not move if steam pressure is too low. Make sure the boiler has enough water. Heat the boiler evenly to build pressure. Check the piston and cylinder for dirt or rust. Clean moving parts gently to avoid damage. Lubricate joints with a small drop of oil. Confirm the wheels spin freely without obstruction.
Overheating Problems
Overheating can damage the boiler and other parts. Avoid heating the boiler too long without water inside. Always refill water before heating again. Use a moderate heat source to control temperature. Let the engine cool down between uses. Watch for signs like steam escaping rapidly or metal turning red.
Tips For Enhancing Performance
Improving your steam engine toy car’s performance can make it run smoother and longer. Small changes can create big effects. Focus on parts that affect speed, power, and efficiency. A well-tuned toy car provides more fun and learning.
Optimize Steam Pressure
Check the steam boiler for leaks and tight seals. More steam pressure means stronger power. Use clean water to prevent blockages. Avoid overfilling the boiler to keep pressure steady.
Improve Wheel Traction
Use rubber bands or soft materials on the wheels. Better grip stops slipping on smooth surfaces. Align wheels straight to reduce friction. Clean wheels regularly for best contact.
Reduce Friction Between Moving Parts
Apply a small amount of oil to joints and axles. Less friction helps the car move faster. Use lightweight materials for moving parts. Check for loose connections that cause drag.
Balance Weight Distribution
Place heavier parts near the center of the car. Balanced weight improves stability and speed. Avoid too much weight on one side. Adjust parts carefully and test after each change.
Enhance Steam Flow
Make sure steam pipes are clear and straight. Smooth steam flow increases engine efficiency. Use wider pipes for better pressure. Avoid sharp bends that block steam movement.
Frequently Asked Questions
What Materials Are Needed To Make A Steam Engine Toy Car?
You need basic materials like a small boiler, steam engine kit, metal or wood for the chassis, wheels, and tubing. Safety gear and simple tools like screwdrivers and pliers are also essential for assembly and operation.
How Does A Steam Engine Power A Toy Car?
Steam engine powers a toy car by converting steam pressure into mechanical motion. The steam pushes pistons or turbines that rotate the wheels, creating movement. This process mimics real steam engines on a smaller scale, making it educational and fun.
Is Building A Steam Engine Toy Car Safe For Beginners?
Yes, building a steam engine toy car is safe if you follow instructions carefully. Use low-pressure steam and supervise children during assembly and operation. Always wear safety glasses and work in a well-ventilated area to avoid steam burns or accidents.
How Long Does It Take To Build A Steam Engine Toy Car?
Building a steam engine toy car typically takes 2 to 4 hours. The time depends on your experience and the complexity of the kit. Taking your time ensures proper assembly and safer operation of the toy car.
Conclusion
Building a steam engine toy car is a fun project. It combines creativity and learning. With simple materials, you can create a moving masterpiece. This project encourages curiosity and problem-solving skills. Kids and adults alike will enjoy the process. Each step teaches something new about mechanics.
Your finished toy car will showcase your effort and innovation. Share your creation and inspire others to try it too. Making things yourself is rewarding. This steam engine toy car is a great start. Enjoy the journey of building and learning.
Happy crafting!