
Are you ready to dive into a delightful world of creativity and relaxation? Crocheting puzzle animals is not just a hobby; it’s a rewarding experience that combines the joy of crafting with the satisfaction of solving a puzzle.
Imagine holding a whimsical animal figure in your hands, knowing that you crafted every piece with care. This guide will walk you through the simple steps to create your very own crochet puzzle animal. You’ll discover how to transform a few skeins of yarn into an enchanting creature that will captivate both young and old alike.
Get ready to unleash your imagination and create something truly unique! Keep reading, and let’s unravel the secrets of this charming craft together.

Credit: www.reddit.com
Materials Needed
Gathering the right materials sets the foundation for crafting your crochet puzzle animal. The feel of the yarn, the size of your hook, and the tools you have on hand all influence the final look and ease of your project. Choosing carefully saves you time and frustration as you bring your animal to life.
Yarn Selection
Pick a yarn that matches the texture and weight you want for your puzzle animal. Acrylic yarns are popular because they’re affordable and come in many colors, making it easy to mix and match. Cotton yarn offers a smooth finish and holds shape well, which is great for puzzle pieces that fit snugly.
Think about the yarn weight too—worsted weight yarn is a solid choice for beginners as it’s easy to handle and creates a sturdy fabric. Lighter yarns like sport or DK weight can give more delicate details but might require more skill and patience. What kind of texture do you want your finished puzzle animal to have?
Hook Sizes
The hook size you choose affects the tightness of your stitches and the size of your puzzle pieces. Using a smaller hook than recommended for your yarn creates tighter stitches, which is perfect for a puzzle animal that won’t fall apart. I found that a 3.5mm or 4mm hook works well with worsted weight yarn for this purpose.
Try different hooks to see how they change your stitch tension. If the stitches are too loose, your puzzle pieces might not hold together well. Do you prefer a firmer or softer feel when you hold your finished piece?
Additional Tools
Besides yarn and hook, some extra tools make the process smoother. A stitch marker helps keep track of your rounds, so your puzzle pieces come out the right shape. You’ll also want a yarn needle to sew pieces together neatly.
Scissors are essential for clean cuts, and a tape measure helps you check your size as you go. If you plan to add eyes or other features, safety eyes or embroidery thread can bring more character to your puzzle animal. Have you gathered all your tools to avoid interruptions mid-project?
Credit: www.etsy.com
Basic Crochet Stitches
Mastering basic crochet stitches is key to creating your own puzzle animals. These stitches form the foundation of every project, giving you the control to shape your work exactly as you want. Once you get comfortable with these basics, you’ll find it easier to follow patterns and add your own creative touches.
Chain Stitch
The chain stitch is the starting point for most crochet projects. It creates a foundation row that you build upon. Try making a chain of about 15 stitches and notice how it feels—smooth tension will make your work look neat.
Have you ever thought about how the length of your chain affects the size of your puzzle animal? Experiment by making longer or shorter chains to see how it changes your project’s shape.
Single Crochet
Single crochet is a simple stitch that creates a tight, dense fabric—perfect for puzzle animals that need to hold their shape. Insert your hook into the stitch, yarn over, pull through, yarn over again, and pull through both loops.
Try practicing single crochet in rows and rounds to get comfortable. You’ll notice your tension improves, and your stitches look more consistent. This stitch is incredibly versatile and will be your go-to for shaping limbs and body parts.
Slip Stitch
Slip stitch is great for joining pieces, moving your yarn without adding height, or creating a neat edge. To make it, insert your hook into the stitch, yarn over, and pull through both the stitch and your loop in one move.
Using slip stitches can save you time and give your puzzle animal a polished look. How might you use slip stitches to connect different parts of your animal seamlessly?
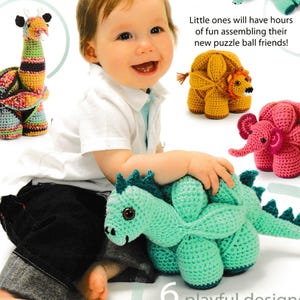
Choosing Your Puzzle Animal
Choosing the right puzzle animal to crochet sets the tone for your entire project. It influences how much time you’ll spend, the skills you’ll practice, and how satisfied you’ll feel once it’s finished. Picking an animal that excites you will keep your motivation high and make the crafting journey enjoyable.
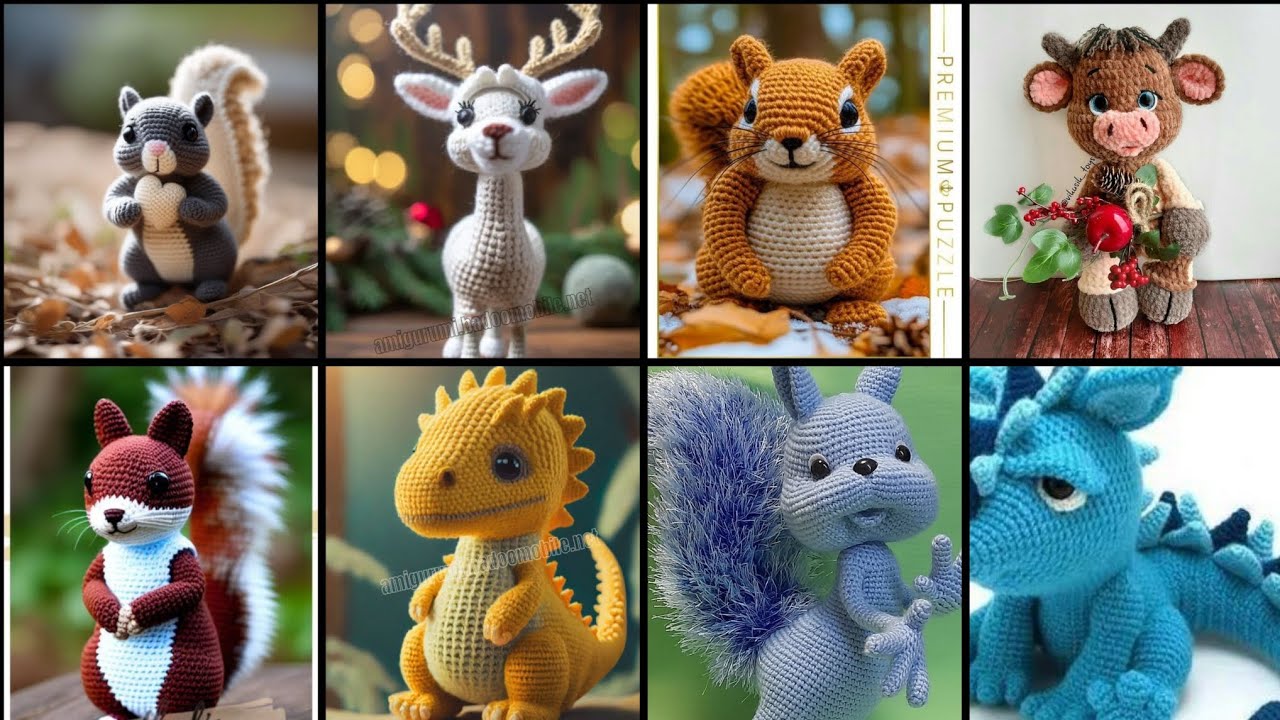
Animal Options
You have a wide variety of animals to choose from, each with unique shapes and features. Common puzzle animals include elephants, turtles, and frogs, but you can also try more exotic creatures like dragons or dinosaurs.
Think about the size and details you want. Smaller animals often mean quicker projects, while larger or multi-part animals can be more rewarding but take longer to complete. Do you want a cute pet or a wild animal? Your choice affects the complexity and final look.
Consider your personal connection to the animal. If it’s meaningful to you, your enthusiasm will show in your work. Have you ever felt more inspired when working on something you truly like?
Pattern Complexity
Patterns vary from simple shapes with few pieces to complex designs with many interlocking parts. If you’re new to crocheting puzzle animals, starting with a simpler pattern can help you build confidence.
Look at the instructions before you begin. Are there advanced stitches or techniques you haven’t tried? Some patterns require skills like changing colors or working in the round, which can be challenging but fun to learn.
Think about how much time you want to invest. Complex puzzles can take days or weeks, while simple ones might be done in a few hours. What’s your available crafting time, and how does that fit with the pattern’s complexity?
Credit: www.youtube.com
Starting Your Project
Starting your crochet puzzle animal project sets the tone for the entire creation. A strong beginning helps keep your stitches neat and your shapes defined. Focus on the foundation to ensure your puzzle pieces fit perfectly. Prepare your yarn, hook, and pattern before you begin. Clear workspace and good lighting also make a big difference.
Creating A Magic Ring
The magic ring forms the center of your puzzle animal. It allows you to start crocheting in the round without leaving a hole. To create one:
- Loop the yarn around your fingers to form a ring.
- Insert the hook into the ring and pull up a loop.
- Chain one or more stitches as your pattern directs.
- Work the required stitches inside the ring.
- Pull the yarn tail tight to close the ring.
This technique gives a clean, tight start for your crochet pieces.
Setting Up The Base
After making the magic ring, set up the base for your animal. This base is the starting shape for each puzzle piece. Follow these tips:
- Work evenly around the ring, increasing stitches as needed.
- Keep your tension consistent for smooth edges.
- Count stitches carefully to match the pattern.
- Use stitch markers to mark rounds or sections.
- Check your work often to avoid mistakes.
A well-made base ensures the puzzle pieces look neat and fit together well.
Crocheting Puzzle Pieces
Crocheting puzzle pieces for animal designs involves crafting small, interlocking shapes. These shapes fit together to form a complete animal figure. Each piece must have the right size and shape for a perfect fit. Careful attention to detail creates smooth edges and consistent stitches. This process blends creativity with precision to build charming puzzle animals.
Shaping Techniques
Start by working in rounds or rows to form puzzle shapes. Use increases and decreases to create curves and angles. Adjust stitch count carefully for each piece’s unique shape. Experiment with short rows to add subtle bends. Blocking pieces helps them keep their shape and size. Use stitch markers to track pattern changes and shaping points.
Joining Pieces
Use whip stitch or slip stitch to join pieces securely. Align edges before sewing for neat seams. Choose yarn that matches piece color for invisible joins. Sew slowly to avoid puckering or gaps. Test fit pieces often to maintain smooth connections. Stuff pieces lightly to keep shape but allow easy assembly.
Adding Details
Adding details to your crochet puzzle animal brings it to life and makes your creation truly unique. These finishing touches can highlight the character and personality of your animal. Small details make a big difference and often turn a simple project into a cherished piece.
Eyes And Features
Eyes are the soul of your puzzle animal. You can use safety eyes, embroidery, or tiny buttons to give your animal expression. Embroidering eyes allows you to adjust the shape and size to fit your vision perfectly.
Don’t forget other facial features like noses, mouths, and eyebrows. These can be stitched on with contrasting thread colors or yarn. Adding whiskers with thin yarn or thread can give extra charm, especially for animals like cats or rabbits.
Think about the expression you want your animal to have—curious, happy, or sleepy? Your choice of details will help convey that emotion clearly.
Color Changes
Color changes add depth and interest to your puzzle animal. Switching yarn colors mid-row or between parts can create stripes, spots, or other patterns. This technique can make your animal look more realistic or playful, depending on your color choices.
Plan your color changes carefully to avoid loose ends and uneven joins. Carrying the unused yarn along the inside can keep your work neat. If you want a smoother transition, try blending two colors by alternating stitches before fully switching.
Have you thought about using variegated yarn for unexpected color shifts? This can add surprise and texture without extra effort. Experiment with color placement to highlight specific body parts or features for a striking effect.
Finishing Touches
Finishing touches bring your crochet puzzle animal to life. These small steps give your piece a neat, polished look. They also help your work last longer. Taking time at the end makes a big difference in the final result.
Weaving Ends
Weaving in ends hides loose yarn strands. Use a yarn needle to thread the tails through stitches. This stops the yarn from unraveling over time. Weave the ends back and forth at least 2 inches inside the work. Trim any extra yarn close to the fabric for a clean finish. This step keeps your puzzle animal tidy and durable.
Blocking And Shaping
Blocking shapes your crochet puzzle animal perfectly. Lightly dampen the piece with water or steam it. Pin it to a flat surface in the desired shape. Let it dry completely to hold the shape well. This makes the stitches even and your animal look more professional. Shaping helps the parts fit together like a real puzzle.
Tips For Creative Fun
Adding creative touches to your crochet puzzle animals makes the process more enjoyable. It lets your imagination run free. These tips help you explore new ideas and make unique pieces. They bring fun and personality to your crochet projects.
Personalizing Designs
Change colors to match your style or favorite themes. Mix yarn types for different textures. Add small details like buttons or embroidery. These details give your animal character and charm. Personal touches make each animal special and one of a kind.
Experimenting With Sizes
Try making puzzle animals in various sizes. Small versions fit in your hand or pocket. Larger ones can be playful pillows or toys. Use thicker yarn and bigger hooks for bigger animals. Use thinner yarn and smaller hooks for tiny animals. Different sizes create variety and keep your projects exciting.
Frequently Asked Questions
What Materials Are Needed To Crochet A Puzzle Animal?
You need yarn, a crochet hook, stuffing, and a yarn needle. Choose soft yarn for a cuddly feel. Use the correct hook size for your yarn thickness. Stuff the animal firmly for shape. Optional accessories include safety eyes and stitch markers.
How Do I Start Crocheting A Puzzle Animal?
Begin by making a magic ring or chain for the head. Follow the pattern’s stitch counts carefully. Increase stitches gradually for shaping. Use single crochet stitches for a tight fabric. Keep your tension even for a neat result.
Can Beginners Crochet Puzzle Animals Easily?
Yes, beginners can crochet puzzle animals with practice. Start with simple shapes and basic stitches. Follow step-by-step tutorials or patterns. Use clear, illustrated instructions to avoid confusion. Patience and practice improve your skills quickly.
How Long Does It Take To Crochet A Puzzle Animal?
Crocheting a puzzle animal takes 4 to 8 hours. Time depends on size, complexity, and your skill level. Smaller animals take less time, while detailed puzzles need more. Break the project into sessions to avoid fatigue.
Conclusion
Crocheting a puzzle animal is fun and relaxing. Each step helps you build a cute, unique toy. Practice makes your stitches neat and even. Take your time to enjoy the process. Soon, you will have a handmade animal to share.
Try different colors and shapes to create variety. This craft brings joy and a sense of pride. Keep learning and experimenting with new patterns. Your crochet skills will improve with each project. Happy crocheting and enjoy your puzzle animal creation!